Ah, the sweet scents of a kitchen filled with freshly baked cookies—there’s truly nothing quite like it! With the holiday season just around the corner, I’ve found myself reminiscing about simpler times when my grandmother would gather us around the table, flour dusting her apron, as she proudly presented her “kitchen sink cookies.” What’s that, you ask? Well, kitchen sink cookies are a delightful mash-up of various ingredients, inviting creativity to run wild. You can toss in just about anything your heart desires, which is how they got their cheeky name! They’re the perfect treat to enjoy with family, friends, or even cozy nights at home. Today, I’m excited to share my take on these scrumptious cookies that are bound to become a favorite in your household!
Recipe Timing
- Prep Duration: 15 minutes
- Active Cooking: 12 minutes
- Total Duration: 27 minutes
- Portion Size: About 24 cookies
- Complexity: Simple
Nutritional Recipe
- Calories per portion: Approximately 180
- Protein: 2g per serving
- Carbs: 24g per serving
- Fats: 9g per serving
- Fiber: 1g per serving
- Sugars: 10g per serving
- Sodium: 70mg per serving
Why You’ll Love This Kitchen Sink Cookies
These cookies are the ultimate answer to your sweet cravings while offering an endless opportunity for customization. The combination of chocolate chips, nuts, coconut flakes, and butterscotch chips creates a taste explosion, while the crushed pretzels add that perfect salty crunch. Each bite is a delightful surprise, and the cookies come together in no time. Plus, they’re great for sharing, making them a hit at any gathering!
The Complete Cooking Journey
Let’s embark on this cooking adventure together, and I promise it will be deliciously rewarding! We’ll start by blending the buttery sweetness with the sugars, mixing in some eggs, and finally combining our dry ingredients with an enticing array of mix-ins. This nifty one-bowl recipe allows for less mess and more fun. Follow along as we create perfect cookies that are chewy on the inside and lightly crisp on the outside.
Ingredients:
- 1 cup unsalted butter, softened
- 1 cup brown sugar, packed
- 1/2 cup granulated sugar
- 2 large eggs
- 2 teaspoons vanilla extract
- 2 1/2 cups all-purpose flour
- 1 teaspoon baking soda
- 1/2 teaspoon salt
- 1 cup chocolate chips
- 1 cup chopped nuts (e.g., walnuts or pecans)
- 1 cup coconut flakes
- 1/2 cup butterscotch chips
- 1/2 cup pretzels, crushed
Method:
Step 1: Preheat the Oven
Preheat your oven to 350°F (175°C) to get things warmed up and ready for your baking adventure!
Step 2: Cream the Buttery Base
In a large bowl, cream together the softened butter, brown sugar, and granulated sugar until the mixture is smooth and fluffy. This step is essential for incorporating air into your cookie dough, creating a lovely texture.
Step 3: Add the Eggs and Vanilla
Beat in the eggs one at a time, making sure to mix well after each addition. Then, stir in the vanilla extract, adding a warm and fragrant note to the mix.
Step 4: Whisk the Dry Ingredients
In a separate bowl, whisk together the flour, baking soda, and salt. This ensures the leavening agent is evenly distributed throughout the flour, leading to perfectly baked cookies.
Step 5: Combine Wet and Dry Mixtures
Gradually blend the dry mixture into the wet mixture, stirring gently until well combined. Be careful not to overmix—this keeps your cookies soft and chewy.
Step 6: Fold in the Goodies
Fold in the chocolate chips, nuts, coconut flakes, butterscotch chips, and crushed pretzels. This is where the magic happens, and the fun of kitchen sink cookies comes alive!
Step 7: Scoop onto Baking Sheets
Drop rounded tablespoons of dough onto ungreased baking sheets, allowing enough space between them for spreading.
Step 8: Bake to Perfection
Bake for about 10 to 12 minutes, or until the edges are golden. Keep an eye on them, as you don’t want to overbake; that golden hue is your ticket to cookie paradise!
Step 9: Cool and Enjoy
Once baked to perfection, cool the cookies on the baking sheets for a few minutes before transferring them to wire racks to cool completely. Then, grab a glass of milk and get ready for the tasty adventure that lies ahead!
Serving Suggestions & Pairings
These cookies are wonderfully versatile! They make a great accompaniment to a hot cup of cocoa or a chilled glass of milk. You can also serve them alongside fresh fruit for a lovely balance of sweet and tart. Perfect for cookie platters during parties, or just as a late-night snack to satisfy your sweet tooth!
Storage & Leftovers Guide
Store your kitchen sink cookies in an airtight container at room temperature for up to a week. If you want to keep them for longer, you can freeze the unbaked cookie dough for up to 3 months. Just scoop the dough onto baking sheets, freeze until solid, then transfer to a freezer-safe bag or container. Bake directly from frozen for a quick sweet treat!
Kitchen Wisdom & Success Tips
- For an ultra-chewy texture, consider refrigerating your dough for 30 minutes before baking. This helps the flavors meld and prevents excessive spreading.
- Experiment with mix-ins—swap out butterscotch chips for peanut butter chips, or add dried fruits for a unique twist.
- Always use fresh baking soda and ingredients to ensure optimal rising and flavor.
Flavor Variations & Adaptations
Feeling creative? Try adding spices like cinnamon or nutmeg for a warm twist. You can also switch up the nuts or go nut-free while adding in seeds like sunflower or pumpkin seeds for a different taste and texture.
Reader Questions & Solutions
-
Why are my cookies spreading too much?
- This might be due to the butter being too soft. Consider chilling the dough before baking.
-
Can I use margarine instead of butter?
- While not ideal due to flavor and texture differences, you can use margarine, but ensure it’s stick margarine, not a spreadable kind.
-
What can I substitute for coconut?
- If you don’t have coconut on hand, you can omit it or replace it with oats for added texture.
-
Can I make these gluten-free?
- Absolutely! Substitute the all-purpose flour with a gluten-free blend designed for baking.
-
How do I know when my cookies are done baking?
- The cookies should be golden around the edges; they will continue to cook on the baking sheet once removed from the oven.
Wrapping Up
These kitchen sink cookies are not just delicious; they’re a celebration of flavors and textures that bring joy to any occasion. Whether you’re baking solo or sharing the process with loved ones, I hope these cookies inspire you to create delicious memories. So roll up your sleeves, preheat your oven, and let the baking begin! Happy cooking!
PrintKitchen Sink Cookies
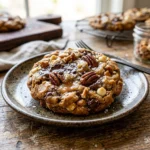
These kitchen sink cookies are a delightful mash-up of various ingredients, perfect for any occasion and customizable to your taste!
- Prep Time: 15 minutes
- Cook Time: 12 minutes
- Total Time: 27 minutes
- Yield: 24 cookies 1x
- Category: Dessert
- Method: Baking
- Cuisine: American
- Diet: Vegetarian
Ingredients
- 1 cup unsalted butter, softened
- 1 cup brown sugar, packed
- 1/2 cup granulated sugar
- 2 large eggs
- 2 teaspoons vanilla extract
- 2 1/2 cups all-purpose flour
- 1 teaspoon baking soda
- 1/2 teaspoon salt
- 1 cup chocolate chips
- 1 cup chopped nuts (e.g., walnuts or pecans)
- 1 cup coconut flakes
- 1/2 cup butterscotch chips
- 1/2 cup pretzels, crushed
Instructions
- Preheat your oven to 350°F (175°C).
- Cream together the softened butter, brown sugar, and granulated sugar until smooth and fluffy.
- Beat in the eggs one at a time, mixing well after each addition, then stir in the vanilla extract.
- Whisk together the flour, baking soda, and salt in a separate bowl.
- Gradually blend the dry mixture into the wet mixture, stirring gently until well combined.
- Fold in the chocolate chips, nuts, coconut flakes, butterscotch chips, and crushed pretzels.
- Drop rounded tablespoons of dough onto ungreased baking sheets, leaving space for spreading.
- Bake for about 10 to 12 minutes, or until the edges are golden.
- Cool the cookies on the baking sheets for a few minutes before transferring them to wire racks to cool completely.
Notes
For an ultra-chewy texture, refrigerate your dough for 30 minutes before baking. Experiment with mix-ins to make them your own.
Nutrition
- Serving Size: 1 cookie
- Calories: 180
- Sugar: 10g
- Sodium: 70mg
- Fat: 9g
- Saturated Fat: 4g
- Unsaturated Fat: 5g
- Trans Fat: 0g
- Carbohydrates: 24g
- Fiber: 1g
- Protein: 2g
- Cholesterol: 30mg