There’s something undeniably magical about Rice Krispie Treats. They evoke a sense of nostalgia that many of us can relate to, bringing back memories of childhood sleepovers or school bake sales. I remember the first time I made them with my grandmother; she would let me pour the marshmallows into the melting butter, and as soon as the gooey mixture formed, I would be mesmerized. My fingers would be sticky from sampling the remnants, and my heart would race with excitement waiting for that first bite. The combination of crispiness, chewiness, and sweet vanilla holds a special place in my heart, and today, I’d love to share this classic recipe with you. It’s more than just a treat; it’s a beautiful blend of simple ingredients that can turn any day into a celebration.
Recipe Timing
- Prep Duration: 5 minutes
- Active Cooking: 10 minutes
- Total Duration: 15 minutes
- Portion Size: Approximately 12 squares
- Complexity: Simple
Nutritional Recipe
- Calories per portion: Approximately 140
- Protein: 1g per serving
- Carbs: 24g per serving
- Fats: 5g per serving
- Fiber: 0g per serving
- Sugars: 8g per serving
- Sodium: 95mg per serving
Why You’ll Love This Rice Krispie Treats
These Rice Krispie Treats are the quintessential snack that transcends generations. They are perfectly sweet with just the right crunch, and the best part? They’re incredibly easy to make! This recipe doesn’t just result in delicious bars; it’s also an opportunity to get your kids involved in the kitchen. They’ll love pouring, stirring, and of course, indulging in the sweet, sticky goodness. Plus, they’re versatile—feel free to mix in goodies like chocolate chips or sprinkles to personalize your creation!
The Complete Cooking Journey
Making Rice Krispie Treats is not just about combining ingredients; it’s about creating joy in the kitchen. The process is quick, but it’s also filled with moments to savor—like watching the butter melt into a golden pool, or seeing marshmallows transform into a fluffy, sugary cloud. As you mix in the crispy cereal, you’ll witness a transformation that brings satisfying crunchiness to every bite. When you finally press the mixture into the pan, you’re not just making a dessert; you’re creating a delightful experience.
Ingredients:
- 3 tablespoons butter
- 1 package (10 oz) marshmallows or 6 cups of mini marshmallows
- 1 teaspoon vanilla extract (optional)
- 6 cups Rice Krispies cereal
Method:
Step 1: Melt the Butter
In a large saucepan, melt the butter over low heat. This gentle heat ensures that your butter doesn’t brown, giving it a rich, creamy base.
Step 2: Add the Marshmallows
Once the butter is melted, add the marshmallows. Stir continuously until they’re completely melted and smooth. Remove the pan from heat—this is when the magic starts to happen!
Step 3: Stir in Vanilla
If you’re using vanilla extract, now’s the time to stir it in. This adds an extra layer of flavor that elevates the entire treat.
Step 4: Combine with Rice Krispies
Gradually add the Rice Krispies cereal into the melted mixture. Stir gently but thoroughly until each piece is evenly coated with the sweet marshmallow blend.
Step 5: Press into the Pan
Transfer the mixture into a greased 9×13-inch pan. With greased hands or a spatula, press down firmly, ensuring an even layer. This helps them hold their shape when cooling.
Step 6: Cool and Cut
Allow the treat mixture to cool for at least 30 minutes before cutting them into squares. The wait is hard, but trust me, the chewy texture is worth it!
Serving Suggestions & Pairings
These delightful treats are perfect for lunch boxes, family gatherings, or just a sweet snack during movie night. Pair them with a warm cup of cocoa or a chilled glass of milk. You can also serve them alongside fresh fruit for a balanced treat that feels party-ready!
Storage & Leftovers Guide
Store your Rice Krispie Treats in an airtight container at room temperature. They’re best consumed within 3 to 5 days for optimal freshness. If they last longer than that—good luck! They’re bound to disappear quickly!
Kitchen Wisdom & Success Tips
- Use fresh marshmallows: They melt better and contribute to a gooier texture.
- Don’t overheat the butter: Keep the heat low; no one wants browned butter for this recipe.
- Press firmly but gently: This will help the treats hold together without crushing them.
- Experiment with mix-ins: Chocolate chips, nuts, or peanut butter can add additional flavors to the classic treat.
Flavor Variations & Adaptations
Shake things up with a few variations! Try adding cocoa powder to the melted marshmallows for chocolate Rice Krispie Treats, or mix in colorful sprinkles to make them festive for birthdays. For a nutty twist, consider adding peanut butter to the melting marshmallows!
Reader Questions & Solutions
-
What if my Rice Krispie Treats are too hard?
If you pressed them down too firmly, they might turn out hard. Next time, be gentle and light when pressing them into the pan. -
Can I use another cereal?
Absolutely! You can use Fruity Pebbles, Cocoa Krispies, or any of your favorites for a fun twist. -
Why are my treats sticking to the pan?
Ensure your pan is well-greased, or consider lining it with parchment paper for easier removal. -
How can I prevent them from becoming stale?
Store them in an airtight container and keep them away from humidity. -
Can I freeze Rice Krispie Treats?
Yes! They can be stored in the freezer for up to 6 weeks—just wrap them well in plastic wrap and place them in a resealable bag.
Wrapping Up
With just a few simple ingredients and a bit of love, you have the power to create something delightful that will bring smiles to everyone’s faces. The joy of making Rice Krispie Treats lies not only in the end result but also in the moments shared with family and friends. So, gather your loved ones, whip up a batch, and relive those joyful memories while making new ones. Happy cooking!
PrintClassic Rice Krispie Treats
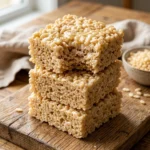
A nostalgic and delightful treat that’s easy to make and beloved by generations.
- Prep Time: 5 minutes
- Cook Time: 10 minutes
- Total Time: 15 minutes
- Yield: 12 squares 1x
- Category: Dessert
- Method: No-Bake
- Cuisine: American
- Diet: Vegetarian
Ingredients
- 3 tablespoons butter
- 1 package (10 oz) marshmallows or 6 cups of mini marshmallows
- 1 teaspoon vanilla extract (optional)
- 6 cups Rice Krispies cereal
Instructions
- Melt the butter in a large saucepan over low heat.
- Add the marshmallows and stir until completely melted and smooth.
- Stir in the vanilla extract if using.
- Combine the Rice Krispies cereal with the melted mixture, stirring until evenly coated.
- Press the mixture into a greased 9×13-inch pan, using greased hands or a spatula.
- Cool for at least 30 minutes before cutting into squares.
Notes
Store in an airtight container for up to 5 days. For a fun twist, mix in chocolate chips or sprinkles.
Nutrition
- Serving Size: 1 square
- Calories: 140
- Sugar: 8g
- Sodium: 95mg
- Fat: 5g
- Saturated Fat: 3g
- Unsaturated Fat: 1g
- Trans Fat: 0g
- Carbohydrates: 24g
- Fiber: 0g
- Protein: 1g
- Cholesterol: 15mg