Can you remember the last time a dessert made you feel like a kid again? For me, it was the moment I took my first bite of Biscoff cheesecake. The combination of creamy texture and the sweet, spiced flavor of the Biscoff cookies instantly transported me to a cozy café, where life felt as sweet as the treats on the counter. I can vividly recall the day I decided to recreate the magic of those little bites of nostalgia in my own kitchen. With each layer I whipped together, I felt a sense of joy, knowing that I was crafting something delicious to share with family and friends. This cheesecake not only captures the essence of childhood treats but also brings comfort with every rich, velvety bite.
Recipe Timing
- Prep Duration: 20 minutes
- Active Cooking: 15 minutes
- Total Duration: 4 hours 35 minutes (includes freezing time)
- Portion Size: Serves 8
- Complexity: Simple
Nutritional Recipe
- Calories per portion: Approximately 400
- Protein: 6 grams per serving
- Carbs: 36 grams per serving
- Fats: 28 grams per serving
- Fiber: 1 gram per serving
- Sugars: 24 grams per serving
- Sodium: 215 mg per serving
Why You’ll Love This Biscoff Cheesecake
This Biscoff cheesecake is more than just a dessert; it’s an experience. With its crunchy cookie crust that gives way to a rich, fluffy filling, it perfectly balances sweetness and spice. The luscious Biscoff spread folded into the cream cheese adds a luxurious touch that makes this cheesecake a showstopper at any gathering. Whether you’re celebrating a special occasion or simply indulging after a long day, this dessert is sure to impress.
The Complete Cooking Journey
Embarking on this Biscoff cheesecake journey is like unwrapping a beautifully packaged gift — there’s joy in each layer! Let me share the delightful steps to create this masterpiece.
Ingredients:
- 8 Biscoff cookies, crushed
- 4 tablespoons unsalted butter, melted
- 16 oz cream cheese, softened
- 1 cup powdered sugar
- 1 cup heavy whipping cream
- 1 teaspoon vanilla extract
- 1/2 cup Biscoff spread
- Additional Biscoff cookies for topping
Method:
Step 1: Prepare the Crust
Preheat your oven to 325°F (160°C). In a mixing bowl, combine the crushed Biscoff cookies with the melted butter. Press this mixture firmly into the bottom of a 9-inch springform pan to create a sturdy crust that will hold the creamy filling.
Step 2: Mix the Cream Cheese Filling
In a separate bowl, beat the softened cream cheese until it’s perfectly smooth. Gradually add in the powdered sugar while mixing to achieve a sweet and creamy consistency. Then, incorporate the heavy whipping cream, vanilla extract, and Biscoff spread, mixing until everything is well combined and fluffy.
Step 3: Assemble the Cheesecake
Pour the delightful cream cheese filling over your prepared crust, using a spatula to smooth it out and create an even surface for the ultimate indulgence.
Step 4: Chill for Perfection
Place the cheesecake in the freezer for at least 4 hours. This waiting game ensures that your dessert sets into a sliceable, luscious creation.
Step 5: Garnish with Biscoff Goodness
Before serving, add a touch of flair by topping your cheesecake with additional Biscoff cookies. This not only elevates the presentation but adds a lovely crunch with each bite.
Step 6: Slice and Enjoy!
Once everything is set, it’s time for the moment of truth. Slice your Biscoff cheesecake and prepare for a delicious experience that is sure to please everyone at the table.
Serving Suggestions & Pairings
This Biscoff cheesecake is divine on its own, but pair it with a dollop of whipped cream or a drizzle of caramel sauce for added indulgence. A cup of freshly brewed coffee or a warm cup of chai would be the perfect complement, enhancing those spiced flavors.
Storage & Leftovers Guide
Keep this cheesecake wrapped tightly in plastic wrap or stored in an airtight container in the freezer for up to a month. Before serving leftovers, let it thaw in the refrigerator for a few hours.
Kitchen Wisdom & Success Tips
- To ensure the cheesecake comes out smoothly from the springform pan, lightly grease the bottom with butter before adding the crust.
- Don’t skip the freezing step! This helps the cheesecake set properly for easy slicing.
- If you want an even richer flavor, try mixing in some chopped Biscoff cookies into the filling.
- For a gluten-free option, use gluten-free cookies for the crust.
Flavor Variations & Adaptations
Consider adding a swirl of chocolate or caramel sauce into the filling for a delightful twist. You could also switch the Biscoff spread with Nutella for a different flavor profile!
Reader Questions & Solutions
-
Q: Can I make this cheesecake without a springform pan?
A: Yes! Just use a regular pie dish, but be cautious when serving, as it might be tricky to get out intact. -
Q: How can I make this cheesecake ahead of time?
A: You can prepare it a day in advance and keep it frozen until you’re ready to serve. Just allow it to thaw in the fridge before slicing. -
Q: What can I use instead of heavy whipping cream?
A: For a lighter option, mascarpone cheese or whipped coconut cream can be good substitutes, though the texture might differ slightly. -
Q: Can I use regular sugar instead of powdered sugar?
A: You can, but the filling might not be as smooth. If needed, blend granulated sugar in a blender first to achieve a finer texture. -
Q: How long can I keep leftovers?
A: Stored properly in the freezer, leftovers can last up to a month. Just make sure to thaw it in the fridge before enjoying again!
Wrapping Up
With this Biscoff cheesecake recipe, you’re not just preparing a dessert; you’re crafting memories. Each step invites you to immerse yourself in flavors that dance on your palate and bring warmth to any gathering. I hope you find joy in creating, sharing, and savoring this delightful cheesecake. Happy baking!
PrintBiscoff Cheesecake
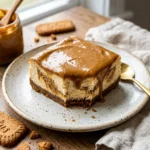
A rich and creamy Biscoff cheesecake with a crunchy cookie crust, perfect for indulging in nostalgia and comfort.
- Prep Time: 20 minutes
- Cook Time: 15 minutes
- Total Time: 275 minutes
- Yield: 8 servings 1x
- Category: Dessert
- Method: Freezing
- Cuisine: American
- Diet: Vegetarian
Ingredients
- 8 Biscoff cookies, crushed
- 4 tablespoons unsalted butter, melted
- 16 oz cream cheese, softened
- 1 cup powdered sugar
- 1 cup heavy whipping cream
- 1 teaspoon vanilla extract
- 1/2 cup Biscoff spread
- Additional Biscoff cookies for topping
Instructions
- Preheat your oven to 325°F (160°C). In a mixing bowl, combine the crushed Biscoff cookies with the melted butter. Press this mixture firmly into the bottom of a 9-inch springform pan to create a sturdy crust that will hold the creamy filling.
- In a separate bowl, beat the softened cream cheese until it’s perfectly smooth. Gradually add in the powdered sugar while mixing to achieve a sweet and creamy consistency. Then, incorporate the heavy whipping cream, vanilla extract, and Biscoff spread, mixing until everything is well combined and fluffy.
- Pour the delightful cream cheese filling over your prepared crust, using a spatula to smooth it out and create an even surface for the ultimate indulgence.
- Place the cheesecake in the freezer for at least 4 hours. This waiting game ensures that your dessert sets into a sliceable, luscious creation.
- Before serving, add a touch of flair by topping your cheesecake with additional Biscoff cookies. This not only elevates the presentation but adds a lovely crunch with each bite.
- Once everything is set, it’s time for the moment of truth. Slice your Biscoff cheesecake and prepare for a delicious experience that is sure to please everyone at the table.
Notes
Keep this cheesecake wrapped tightly in plastic wrap or stored in an airtight container in the freezer for up to a month. Before serving leftovers, let it thaw in the refrigerator for a few hours.
Nutrition
- Serving Size: 1 slice
- Calories: 400
- Sugar: 24g
- Sodium: 215mg
- Fat: 28g
- Saturated Fat: 15g
- Unsaturated Fat: 8g
- Trans Fat: 0g
- Carbohydrates: 36g
- Fiber: 1g
- Protein: 6g
- Cholesterol: 80mg